
Getting started · Owner mobile app (Android or iPhone)
Getting started with RentPayor
Follow the RentPayor owner mobile app from sign-in through Portfolio, Properties and your first property, using focused UI examples without exposing customer data.
The PDF includes these steps and their available product screenshots.
Before you begin
- A supported RentPayor account and access to an owner workspace.
- The name of the first property you manage; you do not need an active M-Pesa collection destination to create it.
Step-by-step walkthrough
- 1
Sign in and enter the owner workspace
Open the RentPayor mobile app. Choose Continue with Google (or Continue with Apple where supported), finish sign-in, and select or create your organization when prompted. You can start managing properties before connecting an M-Pesa rent destination.
- 2
Open Portfolio
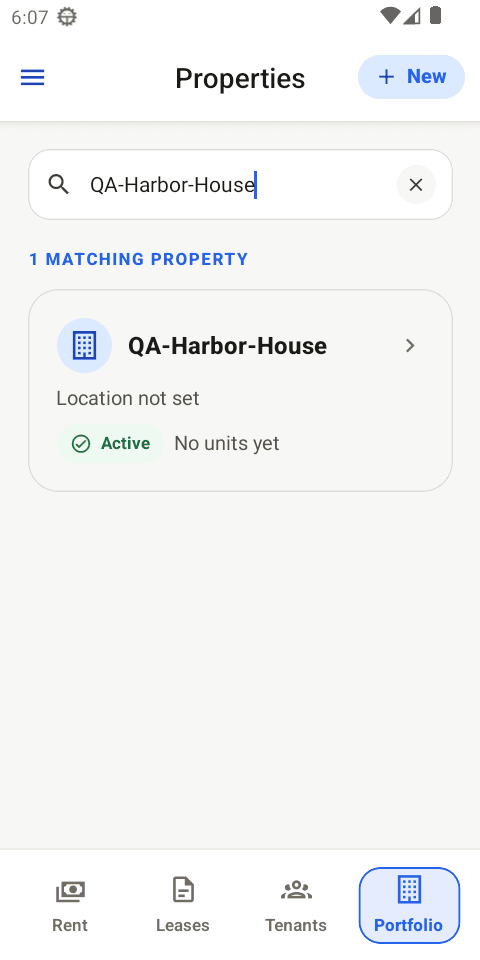
From the bottom navigation, tap Portfolio. The selected Portfolio tab opens the property-management area, where you can review properties before creating or editing records.
Current local QA capture: Portfolio is selected in the bottom navigation and the property-management area is open. - 3
Open Properties, then tap New
Open Properties from the Portfolio tab. To add a property, tap the blue New action in the upper-right corner. You do not need to search or filter the list first; if the list is empty, use the available Add property action instead.
Current local QA capture: the fictional QA-Harbor-House property is visible and New is available in the header. - 4
Enter the required property details
On the New property form, enter Property name and choose Rental use: Residential or Commercial. Expand location and other details only when you need to add optional information, then tap Create property.
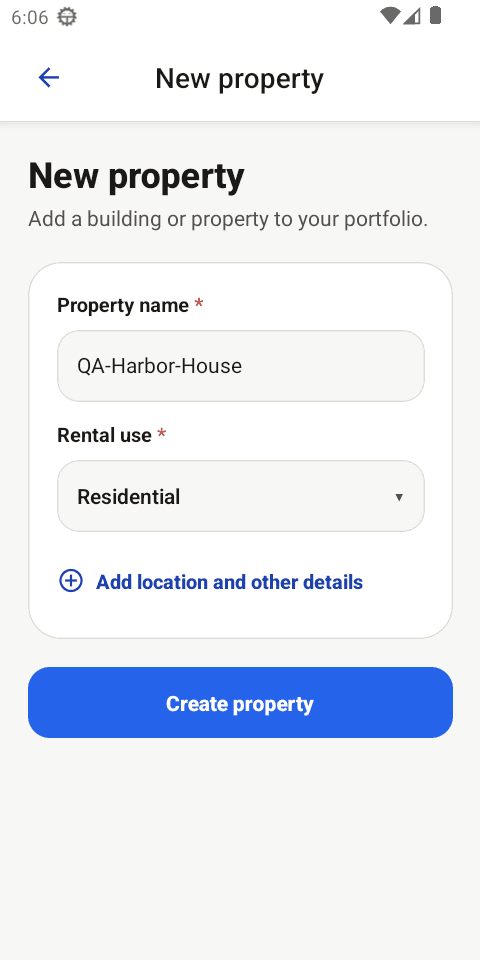
Current local QA capture: the required name and rental-use fields are filled with fictional data, and Create property is visible. - 5
Save the property and continue
After Create property succeeds, RentPayor opens the saved property detail. From here you can add units, register tenants and create leases. M-Pesa collection setup remains optional until you are ready to receive online payments.
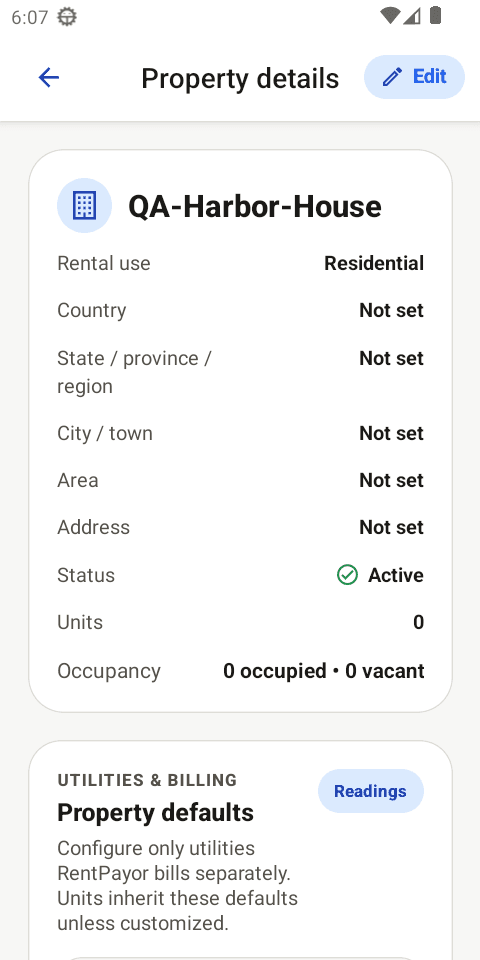
Current local QA capture: the newly saved fictional property is active with no units yet.
Expected result
- You can enter your owner workspace and find the property-management area.
- You know the exact action to add a property and which fields are required.
- Your saved property is ready for units, tenants and leases without mandatory M-Pesa setup.
Important details
- The sign-in step is intentionally text-only because development-only shortcuts are not part of the public production flow.
- The four screenshots are current local QA captures from the owner mobile app using the fictional QA-Harbor-House record; they are not production data.
- Organization and sign-in choices may differ between Android, iPhone and existing workspaces.